

By now, I am sure you have seen the trendy designs with wavy text.
Every time we make one, we get asked, "How did you do that?". We hope this blog post helps you make your own designs!
I am using Silhouette Studio Business Edition for this post.
Starting out, you want a good font with some character. I like Serif fonts for these designs. I went to Silhouette Design Store to check out their fonts and found one I liked.

TIP: If you are going to use the font you chose for selling products, make sure you check the commercial box so that you have the correct license.
Once I have the font I like, I head over to the Silhouette Studio software and open up a new art board.

On the left side, navigate down to the capital A to open up a text box. Add your text as desired on your art board. In this example, I decided to use Ohio and duplicate it 4 times.

To change your text to the font you have chosen, highlight your words and head to the right side of the screen, navigating down to the A| icon to open up the text style box. Find your font and click on it to change your text to the new font.

Now that I have my text in the font I desire, I want to pull it together a little closer, align the words and ensure good spacing between the lines. The software helps me do this by using these options.
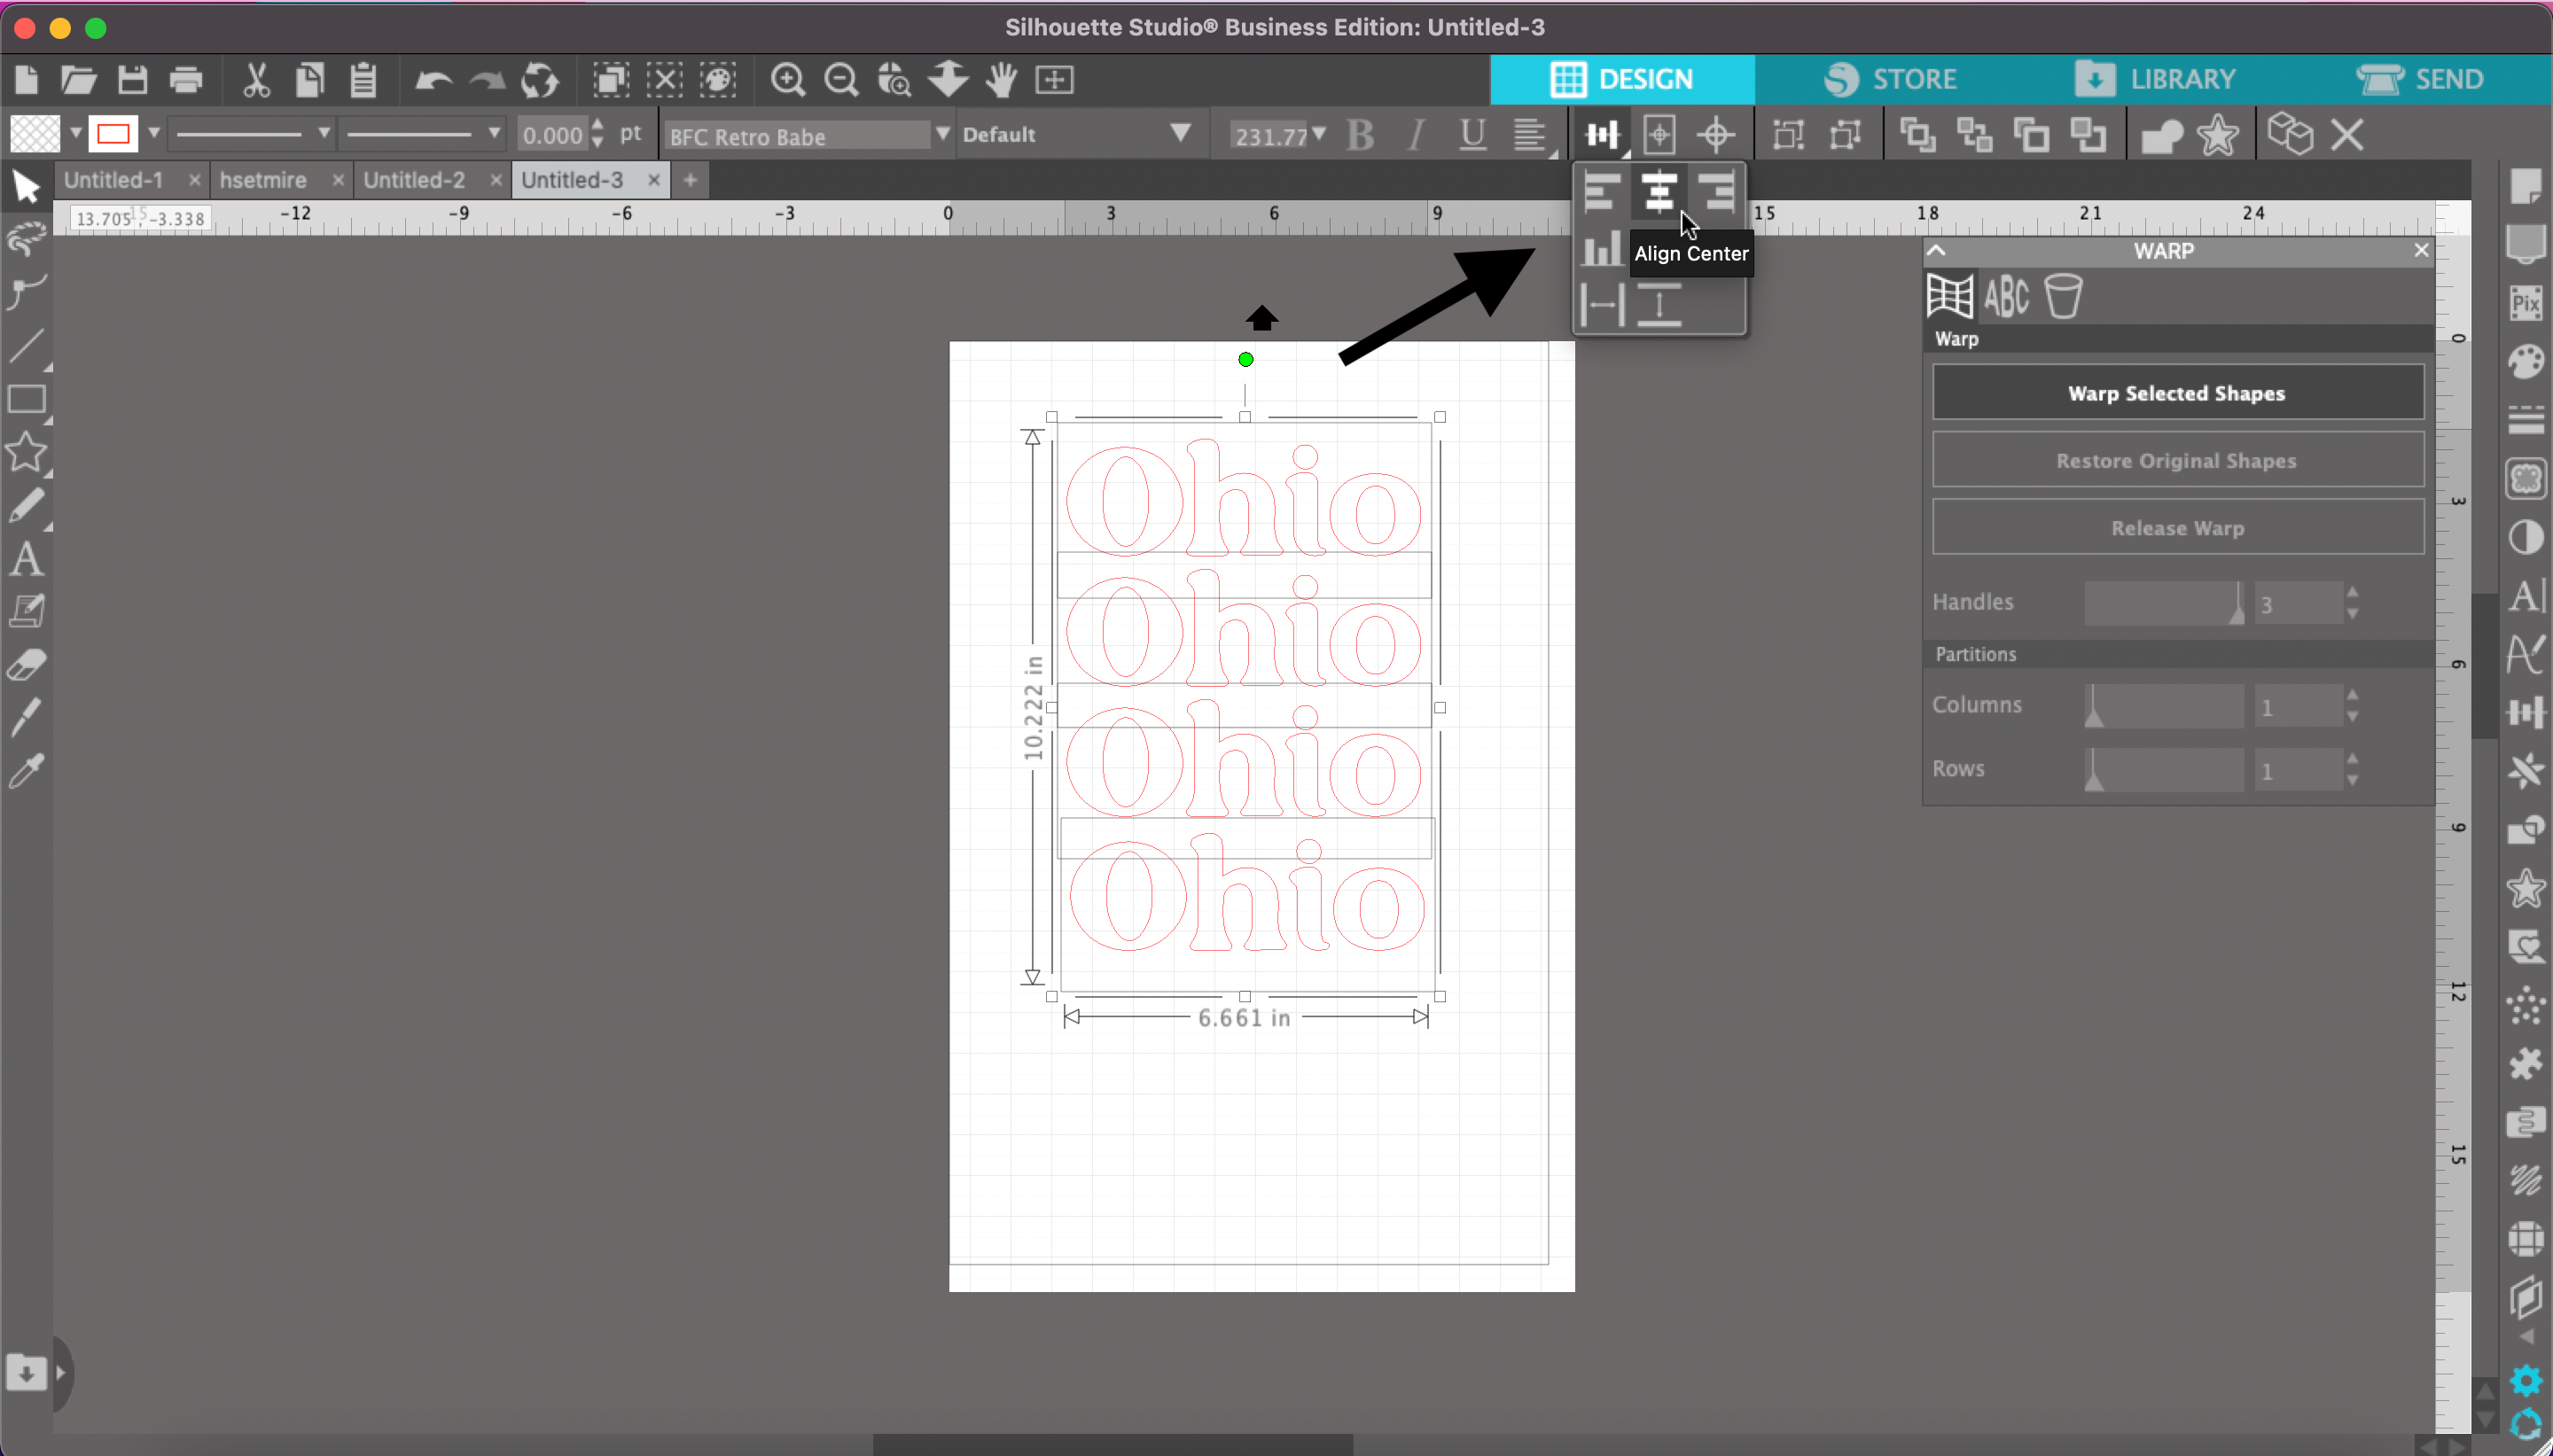

It's finally time to warp the words! Head back over to the icons on the right side of Silhouette Studio and look for the "warp" menu.
NOTE: you must have Silhouette Studio Designer edition or higher to access the warp feature.

Once you have opened the warp menu, you can choose to either warp yourself or use one of the 12 preset warp options.
First let's have a look at how to warp your image yourself. Click on your words (hint, if you didn't group these together you will need to highlight them all so the box is around all words you want to warp) then click on "Warp Selected Shapes".

It will now look like this image below. Now using your mouse, pull in any direction on these points and you will see your image start to warp to how you are pulling it.

Have some fun and play around until you get a design you like, it's easy to reset your design and start over. Just select your design and click on "Restore Original Shapes".


Do you want some additional help in getting the right shape? Use one of the preset warp options by clicking on the "ABC" icon on the Warp window.

Even with these presets, you can adjust it to your own liking by pulling on the nodes that are highlighted. Some will give you a few nodes, and some will give you many! Use your imagination to create a unique design!


Once you are happy with the design, pick out your favorite heat transfer vinyl or adhesive vinyl to cut out! Our favorite heat transfer vinyl to use with this type of design is Stahls Metallic HTV! Once put in a dryer gives you a cool brushed metal look. But these designs can work with any type of HTV!
You can find our large selection in our store or order online from us here: